
You are currently browsing the tag archive for the ‘family fun’ tag.

Last week I shared the Top 5 Fun Activities my kids enjoyed in 2016. This week I am sharing with you our most favorite places to visit. We did a lot more traveling this year than what I’ve shared on the blog. I just haven’t had time to update you all on the details yet. We tend to stick to local places of interest and make a few day trips through the year. But in 2016 we took a bonafide vacation and squeezed in some amazing museums and art! Keep an eye out for those future posts.
As I was digging through my posts to share with you today, I was reminded of my life with two very energetic toddlers who had two speeds: nap and full throttle. I spent a lot of time scouting safe places we could go and let them roam. Of course it also had to be educational, fun, and help them burn off some energy. So, I’ll start by sharing our favorite fun local places to go with little ones. We often look for free things to do, but sometimes fun comes with a price tag. With any luck it’s a small price tag. If you click on the name of the place it will take you to my original post about our experience at each location and you can find additional info links there.
LOCAL PLACES
Storm King– has to be our most favorite local place for sculptural art. Not only are the sculptures larger than life, but there is plenty of room for the kids to roam and run free. The paved walk ways make it easy to get strollers and wagons through. There are bathrooms and a café. It is very family friendly for all age groups and mobility. During the summer months they have one free admission day per month!

Trevor Zoo– this little local zoo is the perfect size for little people to enjoy. The paved path lends plenty of space and traction for little feet, and the exhibits are interesting. There are animals beyond our usual backyard habitats. Plenty of photo ops and room to burn off some energy!

Mohonk Visitor Center– this adorable area is perfect for moms who need a break from chasing kids. If your kids really need to stretch their legs, you can take them outside to the paved trail. Open all year and free to explore. If you want to check out other trails you can get a free one week pass offered once a year to Ulster County Residents. Or, you can sign up for the annual park membership and use any trail at any time.

Michael’s Farm– this private little farm located in Saugerties has a nice array of animals. There are farm animals, lamas, deer, ponies, emus and chickens. There are a lot of experiences to have in just one visit. They also offer camp sessions during the summer and school breaks. It is located off the beaten path and is very family friendly. We’ve enjoyed many visits and it is always a lot of fun!

DAY TRIPS
Animal Land– this one is our absolute favorite! The park is so clean, the animals are well taken care of and there are so many play areas for kids to enjoy. It is very stroller friendly, and is mostly covered by trees making it cooler on really sunny days. We traveled just over an hour from home, but spent half a day there playing and interacting with the animals.

Lake George – before this summer I had only ever spent an hour or two in Lake George. I was stopping through on my way home from another trip so, I had absolutely no idea how much this area has to offer. Returning with my little family was wonderful experience! We enjoyed local beaches, games on the main strip and found a little hideaway park that is perfect for little ones to burn off some energy.

Howe’s Caverns– this is a special place for me. I grew up visiting the caves during school trips and just for fun with friends. Before you go you have to read this guide for the inside scoop. There is a lot you should know before going down below. I was excited to see how many new activities they have besides the caves. Plenty for us to go back to experience!

I hope this helps with planning out some fun trips in the new year, or maybe ideas for when you are feeling spontaneous. These are tried and true family favorites. We hope you enjoy them too!
The Whatever Mom is a full-time wife and twin mama living on coffee and wine. She enjoys the pure rush of cleaning the BIG potty between loads of laundry. It is her dream that moms everywhere accept and embrace the Whatever Mom philosophy which can be found here. You can also find her musings and popular shares on Facebook and Twitter. Stay up to date with her creative ideas and outings on Pinterest.

Happy 2017 Everybody!
As the new year begins I like to take a look back at what worked for us during the previous year. I always wonder if there are any traditions, or fun activities we’d do again. I like to look over the photos we took on our adventures through the year and relive the fun. I also take a look over my blog posts to see where in the Hudson Valley we’ve been and what activities we’ve enjoyed the most.
My kids and I have really enjoyed our travels in the Hudson Valley and beyond. There are so many great places to see and fun things to do in our gorgeous valley. But it can been a challenge to find fun things to do when the weather keeps us inside. Somehow we always find something fun! So I gathered up my top five posts for indoor activities we enjoyed in 2016.
TOP 5 INDOOR ACTIVITIES
SENSORY PLAY– Sensory activities are always a hit for us. We discovered water beads in 2015, but have been playing with them ever since. We keep them stored in a mason jar and the kids have to wash their hands before use. We get quite a few uses out of them before we throw them away and start with a fresh set.

COOKING – DIY Play Dough kind of counts as a cooking activity. There is no stove required, but there is measuring, mixing and pouring involved. All necessary skills for life and in the end the quiet time is so worth the mayhem of cooking with kids.
BAKING– this can be stressful with kids because it can get messy and chaotic. Take a little help from the store and buy already made dough. Then the rest of the time the kids can play with the dough and make some fun DIY fossil cookies. 
FAMILY FUN– starting a weekly family game night is a fun way to connect with each other and unwind with some laughs. In February we decided to Start A Family Game Night. It has been a great way to forget about the stress of the week and a makes a great kick off to the weekend!

CRAFTS– of course we always include craft projects. The biggest hit this year was our Paper Hand Puppets. It was such a creative, fun way for the kids to use their imagination. Not only did they create each puppet on their own, but those puppets became characters in their play time.

These are just a handful of the fun activities we do each week at home. Now that my kids are a little older I am hoping to do some more art themed projects. I hope 2017 brings all of us some new creativity and inspiration.
If you are like me you might like to plan fun visits ahead of time. So, next week I am sharing a review of our top favorite things to do and places to go in the Hudson Valley.
The Whatever Mom is a full-time wife and twin mama living on coffee and wine. She enjoys the pure rush of cleaning the BIG potty between loads of laundry. It is her dream that moms everywhere accept and embrace the Whatever Mom philosophy which can be found here. You can also find her musings and popular shares on Facebook and Twitter. Stay up to date with her creative ideas and outings on Pinterest.

I really love making candied apples in the fall. But that hard shell coating can be difficult for little ones to bite through. Chocolate, or caramel dipped apples can be so much easier for little ones to eat. Except that my kids never finish an entire apple by themselves. I usually cut it into slices so they can enjoy a portioned sized amount of sweets. It never occurred to me to slice the apples before dipping!
Saturday’s weather was all day dreary. All our fun activities for the day were cancelled so that left us home. We baked and cleaned because what else do you do for long stretches of time with no plans? Just as we were finishing up chores and the kids were begging for something fun to do I remembered I have everything we need to make chocolate dipped apple pops. My kids were in heaven!
Here is what you need:
3 Large apples- any variety
Wooden craft sticks, or skewers- without stain or finish
Chocolate chips
Decorative candies or sprinkles
Begin by washing and drying your apples. Next, slice apples on each side of the core so you have circles. Then you can cut the remaining sides into wedges and secure with a skewer before you dip. (You can remove the skewer before serving the dipped wedges to kids). You can use a small, sharp knife to make a slit in the edge of the apple just deep enough to add your wooden Popsicle stick.

Next, melt your favorite chocolate chips in the microwave, or by using the double boiler method. Bring a small amount of water to a boil in a pot, and place chips in the bowl. Set the the bowl on top of the boiling water and continue stirring until melted. An important thing to remember is you do not need a lot of water, it shouldn’t even touch the bowl. And use a bowl that fits just a bit bigger than the opening of the pot.

Then line a baking tray, or cutting board with wax paper. Insert the Popsicle stick or wooden dowel into each apple.
Once the chocolate is fully melted you can dip your apples into the chocolate. You can use a spoon or spatula to help coat the apples evenly. Place the dipped apples onto the wax paper and let your kids have fun decorating! You can go as simple, or as fancy as you’d like. We used what we have on hand- some M&Ms and Halloween themed sprinkles. You could also use crumbled cookies, crushed pretzels, a drizzle of caramel. Or you can get really fancy and use edible candy eyes found in the candy section of most craft stores.

Pop these into the freezer for about 10 minutes or a little longer. Once the chocolate is solid you are ready to eat! We had so much fun making them on our rainy day, but this could really make a fun Halloween activity, or after school treat.

What toppings would add to these apple pops?
The Whatever Mom is a full-time wife and twin mama living on coffee and wine. She enjoys the pure rush of cleaning the BIG potty between loads of laundry. It is her dream that moms everywhere accept and embrace the Whatever Mom philosophy which can be found here. You can also find her musings and popular shares on Facebook and Twitter. Stay up to date with her creative ideas and outings on Pinterest.

The fall weather seems to have arrived in one fell swoop over the weekend! It was super-hot one day and the next, just as cool and crisp as a freshly fallen apple. I admit I was lured outside by the bright blue sky, the calming breeze and sunlight. There were so many different ways to spend our Saturday, but my husband and I decided to split up with the twins and go our separate ways to give each kid their own date day. My date and I started our day at the local farmer’s market where they have a sweet art corner.
Every week there is a new, free art project to create. One week we colored and cut out bugs and glued them to a cut out paper jar. It was simple, it was easy and the kids really enjoyed it. Now they look forward to stopping by the tent every time we make a trip to our home town farmer’s market. This week was no exception. Well, except I only had one kid to help make a project with.
This week we learned to make paper hand puppets. I can’t get over how easy these are to make and there are no limits to what your imagination can bring to life. My girl decided she wanted to make a red horse, named Ham. Oh five year olds. Once we returned home she was excited to share with her sister how to make her own little puppets.
So here is how you can make your own:
Materials:
8×10 sheet of paper
Glue stick
Extra scrap paper in a variety of colors
Crayons/Markers/Pens (which ever you have on hand)

First fold the 8×10 paper, length wise, equally into thirds.

Next, glue the long edge against the opposite long edge s to create a seam.

With the seam side facing toward you fold the paper in half.

Then fold the short edge toward the short edge on both sides.

This is the base of your puppet, or its body.
Now you are ready to embellish and get creative! You can use the remaining scrap pieces of paper to make eyes, hair, ears, a tongue, a nose and anything else you can think of! Or just use a pen, marker or crayon to draw on details. Let your kids imaginations run wild!
This is such a quick and easy project your kids can easily make an entire cast of characters for a small puppet show. It is a great activity to bring out for kid parties, rainy days or even a sick day. Or simply because it’s Tuesday and you need something fun to do with the kids. Enjoy!
Does your farmer’s market have an art tent for kids to enjoy?

The Whatever Mom is a full-time wife and twin mama living on coffee and wine. She enjoys the pure rush of cleaning the BIG potty between loads of laundry. It is her dream that moms everywhere accept and embrace the Whatever Mom philosophy which can be found here. You can also find her musings and popular shares on Facebook and Twitter. Stay up to date with her creative ideas and outings on Pinterest.
Just as I was sending my kids off to Kindergarten some seasoned friends told me about the after school meltdown. I didn’t think it would be an issue since my kids already spent 5 half days a week in pre-K. They also meltdown about so many things how would I know it was just an end of the day meltdown? Well, turns out after school meltdown is a very real thing.
It takes a lot of energy for kids to process all the busy work expected of their little minds and bodies. On top of academic expectations, there is a lot of emotional interaction and learning that can be exhausting. To help my girls cope we created a calm down basket to help each of them transition from school to home routines.
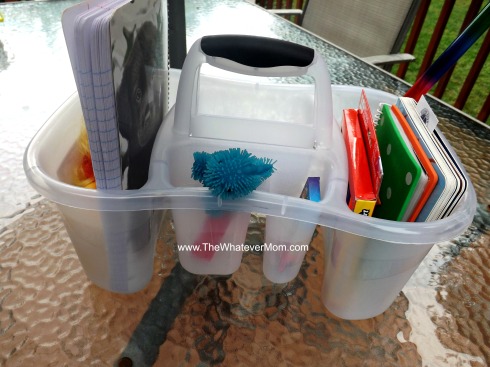
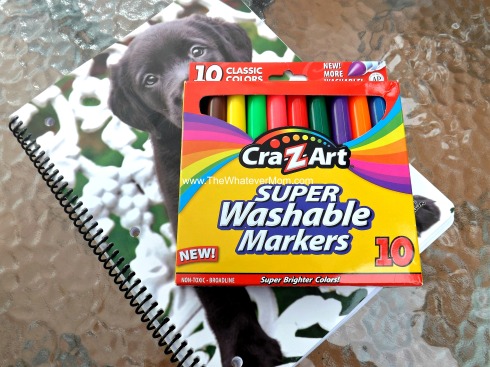
Each basket includes basic art supplies of markers and paper. The girls both picked out a spiral bound note book they can use to draw, doodle, or scribble in.
We also included some soothing things like a squishy ball and a “magic” glitter wand. Each night I set the baskets out on the kitchen table so they can use after school. It turns out they enjoy using them before school too. My girls find coloring and doodling soothing, and it brings a nice quiet to our morning.
Here are some other ways you can use art to avoid the after school meltdown:
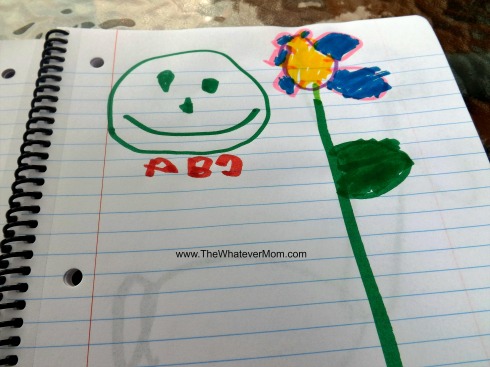
- Provide your kids with a sketch book or journal. It becomes a safe space for them to dump their emotions and stress from the school day. There are no rules for this book and it isn’t something they need to show off for critique or feedback. It’s just their own.
- Put out some play dough for little hands. This helps kids let go of stress and switch gears. It has the same effect as a stress ball and warms up little fingers for writing and drawing.
- Leave art supplies out within reach for a self-guided experience. Whether your child enjoys painting, drawing, sculpting, etc., make sure all their tools are in a place where they can access without help. Using water based and washable supplies will make this a lot less worrisome for parents.
- Turn on soothing music to help set the tone for relaxation. It triggers the mind that something different is happening.Maybe bring out some musical instruments and allow for some unstructured play time.
- Art isn’t just with paint and paper. Help your kids make a healthy snack to refuel after a demanding day. Make funny faces with cheese and crackers, or craft ants on a log. Follow your kids lead in what they enjoy.
Engaging in something less restrictive and creative allows kids to feel like they have some control in their day. They get to follow the demands of their imagination for awhile before having to plug into the demands of chores, homework and the evening routine. So far my girls really like this part of our day. After a short walk back from the bus, we enjoy a simple snack and get to the work of relaxing.
How do you help your kids wind down after a full day of school?
The Whatever Mom is a full-time wife and twin mama living on coffee and wine. She enjoys the pure rush of cleaning the BIG potty between loads of laundry. It is her dream that moms everywhere accept and embrace the Whatever Mom philosophy which can be found here. You can also find her musings and popular shares on Facebook and Twitter. Stay up to date with her creative ideas and outings on Pinterest.
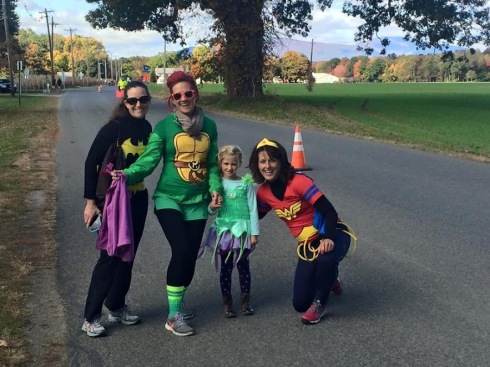
The month of September is designated as Pediatric Cancer Awareness month which is a cause very near and dear to my heart. My niece is a 14 year cancer survivor and I saw first hand just how deeply this disease effected her and my entire family. To honor her and the many thousands of children fighting today we #gogold every September.
We also pick a childhood cancer charity to support and raise funds for. This will be our third year supporting the Miles for Mac Charity 5K Run/Walk. The event takes place in Dutchess County, and is scheduled for Saturday, October 8th – 10AM Mill Road Elementary School Red Hook, NY.
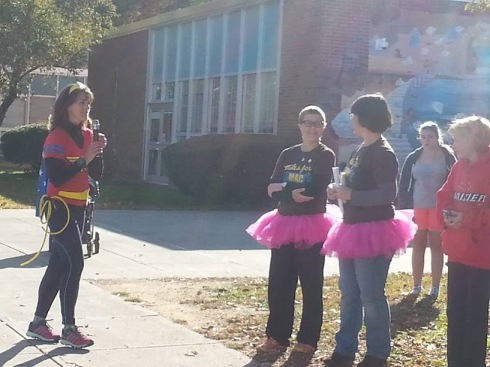
Besides the 5K portion of the day, families can expect to find food trucks, raffles and fun photo ops. Since it takes place at an elementary school there are several playgrounds for kids to enjoy. Everyone is encouraged to participate in their favorite Halloween costume in honor of Mac. In fact, there are awards given for best costume! With a touch-a-truck, DJ, face painting and games there is a little something for everyone.
Even though we participate in the many fun things offered at this event, the reason behind it is heartbreaking. For the last two years teams have gathered to run or walk the event in honor of a little boy named MacAlister, also known as “Mac” to family and friends. Mac was diagnosed with Neuroblastoma (an aggressive cancer) at age 16 months after his parents noticed some unusual patterns in his sleep and moods. At a very tender age he endured several surgeries, 14 rounds of chemo, radiation, and clinical drug trials. This beautiful little boy named Mac battled for eight months before he passed away at age two.
His mothers Emily and Lyndsey, along with their community, honor Mac’s short life each year at this Run/Walk and family fun day. They also work hard to raise awareness about Neuroblastoma and much needed funds for Neuroblastoma research. In just two years, Mac’s family and friends have donated over $30,000 to Memorial Sloan Kettering Cancer Center.
Pediatric cancer research receives less than 4% of the billions of dollars dedicated to cancer research each year. The chemo therapies used are not designed for small children and are at least thirty years old. There are long term effects such as learning disabilities, infertility, weakened immune systems, heart defects, and skeletal defects- these only top the list. So if a child survives cancer there is no guarantee they won’t relapse, or face permanent health issues for life. Research teams need funding to develop less invasive drug treatments and therapies, to discover ways to increase quality of life after treatment and obviously, a cure.
You can register your family to participate in the 5K event, or make a donation directly online. You don’t need to do the run/walk portion of the event. You can make a donation online before you arrive and enjoy the family friendly festivities. There will be a chance to purchase raffle tickets for items provided by local merchants. Every dollar taken in through this event is sent directly to research. There is no overhead or salaries taken from the money raised by this event. Donations are tax deductible and you can request a letter to document your donation.
Donating locally ensures you are helping local families. Donating to cancer research ensures you are helping find a cure for everyone. Get all the updates about the event and find a listing of raffle items by following along on the events Facebook page.
You can register for the event but clicking here.
To learn more about Neuroblastoma click here.
To learn how you can be a voice for pediatric cancer, watch this video and sign the petition at the end:
The Whatever Mom is a full-time wife and twin mama living on coffee and wine. She enjoys the pure rush of cleaning the BIG potty between loads of laundry. It is her dream that moms everywhere accept and embrace the Whatever Mom philosophy which can be found here. You can also find her musings and popular shares on Facebook and Twitter. Stay up to date with her creative ideas and outings on Pinterest.
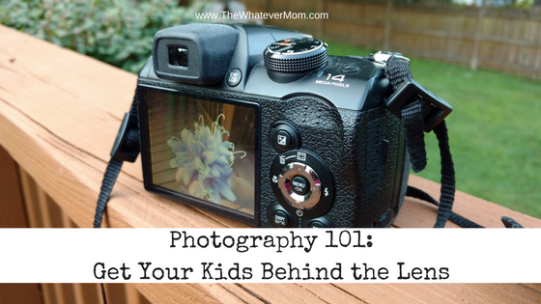
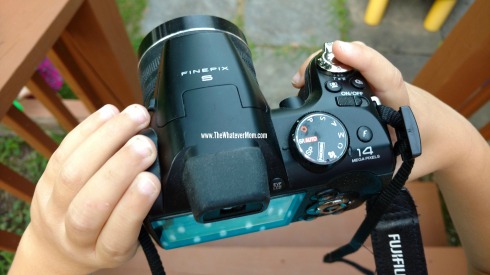
Like most kids today, my children don’t know what life is like without mommy snapping 50 million pictures of nearly every minute of their lives. So it is only natural that they are curious about using my camera. A few summers ago, I picked up a small Fuji digital camera at a garage sale for around $50. It isn’t a great camera, but it is small and I didn’t invest too much money into it. So I handed it off to my kids and set them loose in the back yard. That might sound like a crazy idea, but part of photography is developing a natural instinct to capture a moment, or tell a story in one single frozen frame. That only happens with practice.
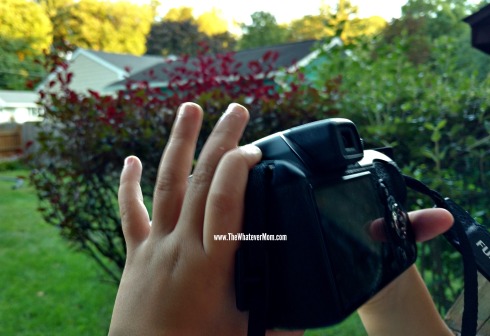
Some people have a natural spark or interest for photography and children are no exception. At first I sat back to watch what kinds of things my kids want to take pictures of. They seemed to want to take action shots of each other pretending to be animals in the wild, “now be a Cheetah and run at me!” Or they took close up shots of bugs and flowers. I tried to offer only a little guidance on how to hold the camera, using the strap for safety and how to use the zoom.
I have to say not every photo is worth a million bucks, but sometimes even a young kid can really nail a shot. It is simply amazing to see what they see through their lens.

Photo Credit: My 5-year-old (No filter)
Here is how you can help your kids get comfortable behind the camera lens:
PHOTO GEAR
You don’t need a fancy camera, or invest money in a child specific camera they will outgrow. You can hand your child your cell phone, or a simple point and shoot camera. Starting with a digital camera makes the most sense as your child will take random crazy pictures of their toes and you can easily delete all of those. As your child matures in technique and style, learning to use an old school camera that requires film can be pretty cool.
CAMERA PARTS
If you still have your camera manual, review it with your child. Teach them the parts of the camera from the lens, to the dial, to the flash. Once they learn the individual parts they can learn how they all contribute to creating a photo. Younger kids just need to know the parts they use the most like the toggle, the flash, the shutter release (button you press to take a photo), the lens and the on/off switch.
SCAVENGER HUNT
A scavenger hunt at any age is a great way for your child to look for photo ops. Create a scavenger hunt of about 10-20 things for your child to take a picture of. If you are out and about in the car they could snap pics of street signs, or mail boxes that they see out of the window. If you are hiking they could snap pics of leaves, sticks, something red, something blue, etc. Even a rainy day at home could produce some really fun photos. For older children they could capture textures, colors, letters, signs, buildings and architecture, or even a self-portrait.
COMPOSITION
There are some rules or guidelines for creating a great photo. Show your child how to split the screen into three sections. When taking close up images help your child identify the foreground and background. These simple techniques will help them learn to fill the frame for a more interesting photo.
LIGHT
Besides having a great subject, lighting is probably the most important way to create a great photo. Lighting can change the mood of a photo and how well your camera captures details. Have your child take photos in different areas of the house to compare how light effects their images. Then step outside to take photos to see how differently the light changes an image.
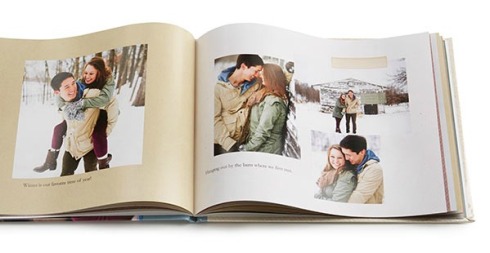
PHOTO DISPLAY
You can print out a few photos to display as art in your home, or create a photo book your child can show off to friends and family. You will be amazed how even kids can create some beautiful, frame worthy images. It could also be fun to host a family art show where you all show off your favorite prints.
The number one rule to remember is to let it be fun. Taking over the shot or telling your kid how to make the picture better takes away from their own creativity. Allowing kids to play with a camera and take photos on their own helps them develop their own creative instincts behind the lens.
Have you let your child unleash their inner photographer yet?
The Whatever Mom is a full-time wife and twin mama living on coffee and wine. She enjoys the pure rush of cleaning the BIG potty between loads of laundry. It is her dream that moms everywhere accept and embrace the Whatever Mom philosophy which can be found here. You can also find her musings and popular shares on Facebook and Twitter. Stay up to date with her creative ideas and outings on Pinterest.
At the end of every summer I am left with a big pile of ticket stubs, mini golf score cards, park maps and parking passes from all of our adventures. I hate to throw them away because they make a fun touchstone to all the fun we’ve had. I love to look back at them and remember the stories of each adventure or activity. So how do I preserve our summer mementos and keep things tidy? Here’s how:
PHOTO BOOKS
At the end of each month I upload our photos to a website with photo storage such as Shutterfly or Snapfish. My photos are stored until I am ready to sit down and order prints, or organize into photo books. I try to create a photo book at the end of every season, or big event. We already have a collection of photo books from my kids’ first birthday, our first family vacation and so on. We love to make a night of looking back when the final book arrives. If you are not someone who likes to keep your ticket stubs, or park passes you can easily take a photo of them to include in a photo book before tossing.
PHOTO DISK
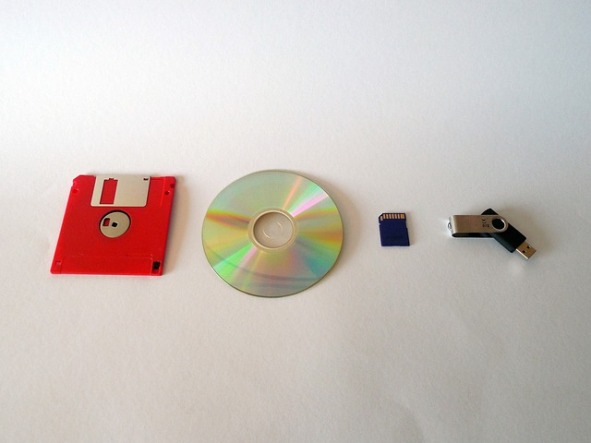
I like to feel like I have a backup system to our digital memories. I did not grow up with the instant gratification of digital pics and digital storage. We had to wait a week before we could see every blurry shot, or thumb print we captured. Even then we had a negative to hold onto in case we lost any of those printed images. If the Internet crashes tomorrow and my computer melts down, I still have all our memories in hard copy. This also works for a SANS Disk or USB drive.
PHOTO SUBSCRIPTION SERVICE

I have not yet tried this, but there are several apps available that allow you to send photos from your phone to print. For a small monthly fee, the service mails the prints to you and you can then put them into albums or other storage. GrooveBook sends 100 bound photos in a small book and Recently sends magazine style books to you each month. Prices vary per service. Order your prints before you head home from vacation and have them waiting for you when you arrive.
MAKE A SMASH BOOK
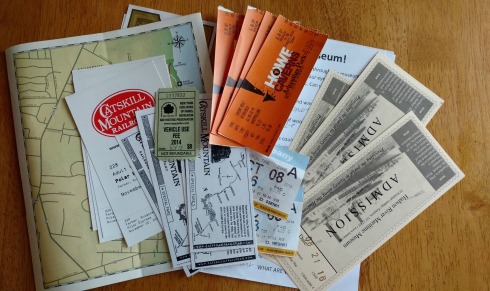
This is one I can get behind. I absolutely love the informal and imperfect way to stash our little pieces of summer. It reminds me of the scrap book I kept through high school. I would just tape my ticket stubs, birthday cards, photos and newspaper clippings to a page. And that’s exactly how you make a smash book.
Start by selecting a notebook. It can be as fancy as you’d like, or simple. Then when you return home from each adventure you tape all your mementos to a page. You can come back later to add photos, doodles, drawings and stories. There is no right or wrong way to do it! Every member of the family can take a turn adding in their own pieces and writing their own memories on the page.
This process is less fussy than creating an intricate scrap book page. Although I think those are super cute, I personally don’t have the time to scrapbook, or shop for supplies. A smash book is like a journal meets photo album. So easy!
How do you store your summer memories?
The Whatever Mom is a full-time wife and twin mama living on coffee and wine. She enjoys the pure rush of cleaning the BIG potty between loads of laundry. It is her dream that moms everywhere accept and embrace the Whatever Mom philosophy which can be found here. You can also find her musings and popular shares on Facebook and Twitter. Stay up to date with her creative ideas and outings on Pinterest.
At the beginning of summer I shared with all of you a list of cool places to get free fun mail for your kids. I hope you and the kids are enjoying all your fun freebies. I know we are! In fact one fun package in particular helped inspire our seed bomb project.
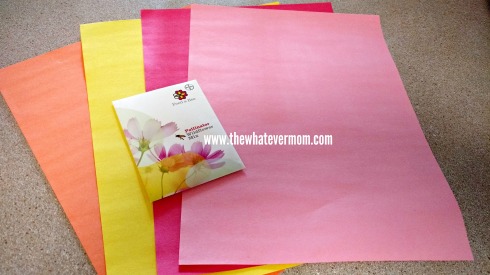
I signed us up to receive a free packet of pollinator wildflower seeds at feedabee.com. Wildflowers attract bees and help feed the population of pollinating insects. You can read more about why this is important by clicking here. Our little packet of about 200 seeds will cover approximately 10 sq. feet. Now we could easily toss these seeds around the back yard and wait, or we could launch them with a sling shot. Why not?
I was flipping through the pages of one of our new kid magazines when I found this unique little project. It is perfect for kids age 6 or older. In just a few simple steps you can create a handful of seed bombs to toss out into the yard, or while out on a hike.
Materials:
4 pages of construction paper
1 packet of pollinator wildflower seed mix
1/2 cup of warm water per sheet of paper
Kitchen Blender
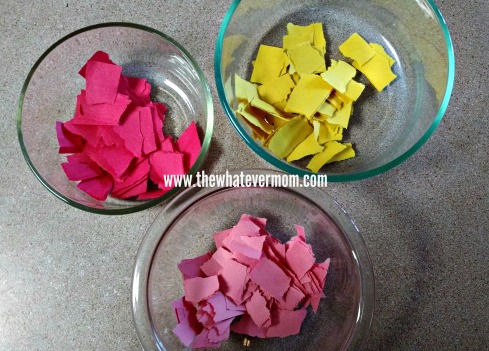
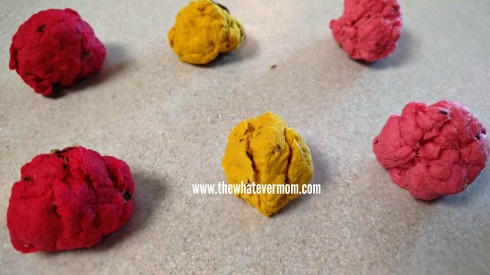
Start by tearing each sheet of paper into tiny pieces and place in separate bowls. Next, pour 1/2 cup of warm water over the pieces. Allow paper to soak for 5 minutes before running through the blender.
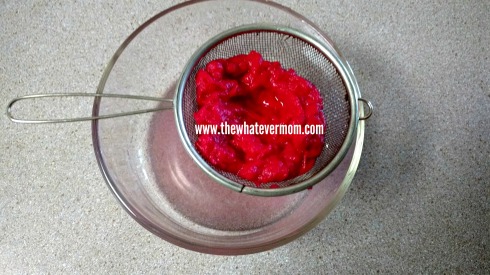
Pour mixture into strainer and squish the paper with the back of a spoon to get most of the liquid out. You want the paper to be pasty, but not completely dry. Discard water and put paper pulp into bowl and add a palm sized amount of seeds. Roll into 1/2 inch sized balls and place on wax paper to dry.
According to my kids the straining step is the most, “boring part” of the project. If you have kids always in a hurry to move on to the next step, perhaps offering a wildflower coloring page, or a list of facts about honey bees to read, will help them while they wait.
Allow your finished product to sit for 48 hours to dry completely. While the bombs dry you can help your kiddos create a sling shot if you don’t already have one. You can find a Y shaped stick in the yard and place a rubber band around the branches. Viola! Instant launcher!
Tips:
- The recipe I found makes more bombs. I cut it in half to accommodate our limited supplies, so we only have six seed bombs to distribute. Which is perfectly even for two kids always assuring me, “she got more than me!” Using three sheets of paper and one seed packet yields approximately two bombs per page.
- You may need to add just a bit more water to the blender when whirling the paper. This will keep the paper from bunching up around the blade. If you add a little too much water that’s OK, you will remove all the extra in the straining step.
When you are ready to launch, find a nice open plain field to fling the bombs into. Maybe a nice open space in your yard, or take a hike and launch into a flowerless area of a field. The bees will thank you for it!
The Whatever Mom is a full-time wife and twin mama living on coffee and wine. She enjoys the pure rush of cleaning the BIG potty between loads of laundry. It is her dream that moms everywhere accept and embrace the Whatever Mom philosophy which can be found here. You can also find her musings and popular shares on Facebook and Twitter. Stay up to date with her creative ideas and outings on Pinterest.
Tucked away on a tiny lot which you probably pass every time you make your way through the village of Catskill, is the Catamount. This kooky little people’s museum is fun for all ages. It is quite unique and if you pass by too quickly you will miss it. It sits just above street level and blends right into the greenery and the remains of an old brick foundation. The Catamount is completely hand built and the brain child of local artist Matt Bua. You can read Matt’s blog to see conceptual sketches, ideas and events held at the museum.

What makes this museum truly unique is that it is a “people’s museum.” All the exhibits inside the belly of the bobcat are donated by members of the community, strangers stopping by and local historical organizations. You will find maps, water color paintings, a carved wooden cat puppet, newspaper articles and much more. Even you are welcome to leave behind a little work of art, a map, or a note. Have fun signing the guest book and looking through to see how far people travel to visit.


The bobcat was installed in 2010 and it was only supposed to stay for one year. But this heart warming feline has grown on the city of cats and folks here have let it stay. Would you believe I drove passed this spot for a year to schlep my kids to preschool and I never noticed the 15 foot cat?!
We found out about this amazing little place through the Follow That Book program at the Catskill Public Library. Librarians Miss Jennifer and Miss Crystal put together a wonderful tour and story time. My girls even enjoyed a game of ping pong using a wooden plank for a paddle. Why not? The entire Catamount is made out of recycled and found objects. Even the eyes are made from old plates and light bulbs. At night you can see them glowing. So it is only fitting we used planks of wood we foud lying around to create our paddles.
Between ping pong and story time we enjoyed a lovely picnic inside the bobcat. Then it was time to chat with the artist himself. He was really great with helping the kids build their own sculpture from found objects. He let the kids take total control of the project and simply guided them with, “where do you feel that piece belongs?” It was educational, interesting and different than your usual story time.
Tips if you plan to visit: Bring a picnic lunch to enjoy at the table inside the museum, or spread out a blanket on the grass nearby.
Bring plenty of bug spray. Even though it is a small lot it is quite lush with greenery.
Be sure to stop by Coney Island just up the street (walking distance) for ice cream and fun kiddie rides. Take your picture with the tiny Statue of Liberty.
Bring a camera!
Bring a small piece of history or your own hand crafted artwork to leave behind.
If you just can’t get enough cats in your visit, be sure to find parking on Main Street and take the walking tour of painted cats. You can find a map at the Greene County Arts Council, or just walk on your own. If you stop by the arts council check out the latest exhibits!
Check out the secret gardens planted between buildings on Main St.
Cool off at the library in the kids books section and pick up your calendar for Follow That Book.
Stop for lunch at Village Pizza or the Garden Gate Deli. Both places are kid friendly, affordable and really yummy!
For a really small village there sure is a lot of free art to see and fun things to find! The girls and I truly enjoyed the day. We can’t wait to make a trip back to leave behind our own piece of history.


The Whatever Mom is a full-time wife and twin mama living on coffee and wine. She enjoys the pure rush of cleaning the BIG potty between loads of laundry. It is her dream that moms everywhere accept and embrace the Whatever Mom philosophy which can be found here. You can also find her musings and popular shares on Facebook and Twitter. Stay up to date with her creative ideas and outings on Pinterest.
