
You are currently browsing the tag archive for the ‘family meals’ tag.
A neighborhood is just the geographic location of your house, until you meet the perfect neighbors that really make it home. Our neighbors the Wall-Carty’s are our family BFFs. We get together at least two days a week to chat and let the kids play. We also share a meal at least once a week.
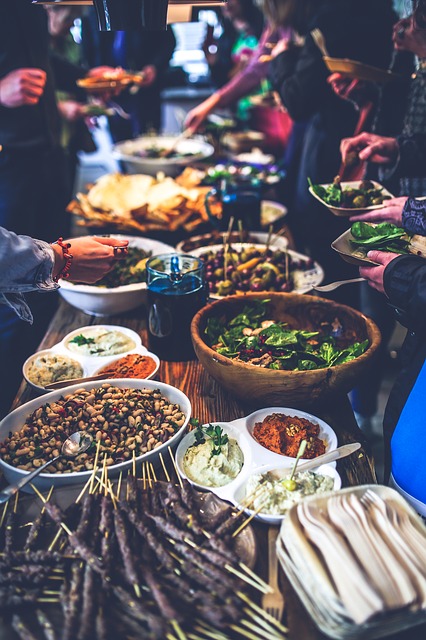
Usually our potluck dinners are thrown together last minute and facilitated by a little begging by all the kids. My favorite part about hanging out with our friends is that it’s always, “come as you are,” whether your house is messy or you’re wearing sweatpants. So anything goes when it comes to our potluck dinners.
Here are 6 reasons I love our kid-friendly dinners and why I recommend you plan one with your neighbors, friends or family:
1. Use Up Your Leftovers – Sometimes we literally grab whatever is in the fridge and head over to our neighbors house or they come to us with their leftovers and voila- instant meal. Not only do you get the pleasure of using up your leftovers, but the kids can choose meals that are new to them so you don’t get the complaining you would get if you just had your own leftovers. Using up your leftovers is a great way to stretch your monthly food budget as well.
2. Please Those Picky Eaters – Having more than one main dish means there’s usually something that will please even the picky eaters in your family. Last night we had a potluck where I made a taco macaroni casserole and our neighbors brought some leftover chicken they had on hand. Both their daughter and ours didn’t want the casserole, but happily ate the chicken and their son and ours wolfed down the casserole. With potluck, there’s virtually no complaining about what’s for dinner.
3. Try New Recipes – Our potlucks are great for getting to try new recipes. Sometimes it gets boring with the same rotation of food, but when you combine meals with another family you get to try things you never had before and test them out on your kids before making them yourself. If you love something your potluck partners bring, you can add great new recipes to your family’s meal plan.
4. A No Cook Night – Who doesn’t want a night off of cooking? The best part of potluck is that we often bring leftovers. Sometimes our family cooks and the other brings leftovers and sometimes it’s the reverse. Last weekend my husband and kids went to a wrestling match last minute and had to leave before dinner, leaving a whole pan of baked ziti for just me and the baby. The next day we had potluck at the Wall-Carty’s and they were making burgers so I grabbed that largely uneaten pan of ziti and didn’t have to cook at all.
5. Play Dates – The kids always want to play with each other and having dinner together means that the kids can hang out longer. Let’s be real, the play dates are for us adults too, especially me who works from home and doesn’t get to talk to adults much during the week.
6. Tag Team Parenting – If you have potluck dinners with family or friends whom you’ve made your honorary family, you can tag team up on the kids to get them to finish their vegetables. While our kids don’t like to listen us when it comes to eating, it helps to have another parent reminding them that they need to eat if they want to get dessert later.
When it comes to getting your kids fed and keeping them happy, you really can’t go wrong with a potluck. Plus it’s a great excuse to get together with your favorite people.
Does your family do potlucks often?
Erin Johnson a.k.a. The No Drama Mama can be found writing on her blog The No Drama Mama and Hudson Valley Parent when she’s not wiping poop or snot off her three adorable kiddos. This “tell it like it is” mama has NO time for drama, so forget your perfect parenting techniques and follow her on Facebook or Twitter for her delightfully imperfect parenting wins and fails. Her work can also be found on The Huffington Post, Money Saving Mom, Mamapedia and Worshipful Living.
I was chatting with another mom at gymnastics class the other night and something she said stuck with me, “I just try to find things to keep her busy.” I thought, “Aren’t kids the busiest people we know?” They have their entire adult lives to be “busy,” but now is a truly wonderful time to help them engage in what’s happening around them. Of all the activities I do with my kids cooking is the one activity that engages all five senses, their minds and even their bodies.
My kids can’t make a four course meal just yet, but they do make pizza, mix together cookie dough, layer in parfaits and make their own sandwiches. When they were infants I pulled their high chairs into the kitchen with me while I made dinner, handed them each a wooden spoon and talked them through my cooking steps. Eventually, they out grew the high chair and sat on the floor next to me stirring their imaginary creations in bowls. As soon as they were stable enough to stand on a chair to reach the counter (around age 2) we started making food together.

The first thing I taught my girls to make is a parfait. You simply layer in your favorite fruit, berries, yogurt and cereal. That’s it! All the ingredients are pre-made and require zero cooking! Kids of nearly any age can easily spoon the ingredients into a bowl or cup and feel accomplished when it is complete! The best part is you can control the contents- whether you use all organic ingredients, low sugar, or even gluten free ingredients.
Here is our favorite parfait recipe:
1 Banana (sliced)
1/2 cup of plain Greek Yogurt
1 TBSP peanut butter (optional)
1 Apple (diced)
1 cup granola or crisp rice cereal
Honey to drizzle
- Mix peanut butter into the Greek yogurt and drizzle with honey.
- Add bananas to the bottom of cup, or bowl.
- Top with 2 TBSP yogurt mixture.
- Layer on diced apple.
- Top with 2 TBSP cereal.
Repeat the layers twice to create one serving. (You can also drizzle a little honey on the top most layers). Eat right away and enjoy!
Other easy things you can make with your kids today (that require zero cooking): peanut butter and jelly sandwiches, homemade trail mix, deli roll ups, pudding, even ice cream in a bag! Another one of our favorites, for another post! Cooking is not only a fun way to keep kids engaged, but it’s an important life skill every kid needs to have!
The Whatever Mom is a full-time wife and twin mama living on coffee and wine. She enjoys the pure rush of cleaning the BIG potty between loads of laundry. It is her dream that moms everywhere accept and embrace the Whatever Mom philosophy which can be found here.
Find more from Roxanne at Hudson Valley Parent and at Masshole Mommy

Well Spring has finally sprung and our gardens are all in full swing. In our family we love to garden. From tomatoes, flowers, cucumbers, herbs and everything in between. In fact we have a rather large herb garden, even bigger than our veggie garden. Some people think it is silly to “Waste” all that yard space, but I love the smells, the flavors and the amazing health benefits from the wide variety of herbs we have.
One of my all time favorite herbs that I use in nearly EVERY single meal is Parsley.
I know your thinking, “That green grassy garnish that use to be placed on every plate in every restaurant back in the 80’s?” Yep that’s the one. I can remember going out to dinner with my parents to The Ground Round and every time we would go I would get this big green piece of leafy “grass” on my plate, one time my dad said. “go ahead, eat it… I dare you” So being the adventurous gal I have always been, I bit it. I was surprised it didn’t have a ton of flavor. Rather a fresh flavor, and yes almost grass like. It wasn’t something we had in our garden growing up and it certainly wasn’t something we had on our dinner plates at home. So to me it was that green leafy grass at The Ground Round. Why in the world did it ever end up on my plate? I didn’t know, but I kinda enjoyed it.
As I grew older and took an interest in cooking and preparing meals I noticed that this herb was making it’s way back to the restaurant scene. Only this time it was finely chopped and only in fancy fine dinning places. So as I learned to cook and appreciate the fancy look of things, I purchased a container of dried parsley. I added it to many things, not because it tasted like anything but it was “fancy”.
As an adult I have come to realize I have a real passion for food and cooking. I was instantly drawn to all the new cooking shows that were found on The Food Network. Guess what I found them using, yes you guessed it…. Parsley. Fresh, finely chopped parsley. Guess what I started to add to all my dishes at home, yep again you guessed it fresh finely chopped parsley.

I found that every time I purchased it, it would go bad before I could use it all. Soon I decided to start growing my own. It was a dangerous thing right at my finger tips. I truly had no reason for liking it so much, other than the chefs all used it on TV. One evening over dinner my husband finally spoke up and said ” What is all this green stuff in my potatoes? “Why must you use so much?” I didn’t want to sound silly and say, “Isn’t it fancy?” So, I refrained and went to do some research for my case.
The case of Husband vs The Use of TOO Much Parsley…..

I would have to say I was preparing a rather convincing case. I found tons of information.
Parsley is actually a power house of an herb.
This is what I found ~
Parsley is highly nutritious and full of anti oxidants.
It also happens to be the world’s most popular herb. ( I knew it – lol)
Parsley is high in Vitamin K,C & A. It is also high in Iron & Folate.
Parsley has been known to~
Lower Cancer Risks
Freshen Bad Breath ( that was why it was used as a plate garnish )
Enhance Immune Systems & Promote Optimal Health
It is a known Natural Anti Inflammatory & Can prevent inflammation such as inflammation associated with arthritis
It is Heart Healthy
Has been used to treat urinary tract infections and many other bacterial issues as it has antibacterial properties.
So can you guess who won that case? All I can say is: We still grow our own parsley and not only is it still on all of our dishes as a garnish I now add it to smoothies, salads, marinades as much more….. It truly is a power house herb!

If your kids will eat soup, it can be a great way to get almost anything into them. With a blender, food processor, or stick blender, you can puree veggies, fruits, proteins, or beans, and they’ll literally disappear into the broth. Even if your kids will eat their dinner without disguise (as mine will), soup is still a fun way to help the vegetables go down, no spoonful of sugar necessary. If your kids tend to be picky, get creative and rename the soup something fun. Transformer soup, martian soup, princess and the pea soup, or whatever will get them smiling. Provide an interesting garnish– shredded cheese, tortilla strips, whole grain goldfish– and the fun will go even further.
Green soup
Broccoli is one vegetable that gets a bad rap. My kids love it, but I know many children (and grown-ups!) who do not. Soup is a great way to serve broccoli, as no one will ever see past the “fun” green color. I found this recipe a while back in Parents magazine. Its base is stock, not milk or cream, which is healthier, and dairy-free; both of which are important to many families. I made it as a first course on Easter, and it was the perfect elegant, simple, tasty soup that “looked like Spring.” Even my 92 year old Grandpa (who does not like broccoli, as it turns out) scraped the bowl clean. Later it occurred to me that I could’ve also tossed in a handful of steamed spinach before pureeing, so I’ll try that next time.

To make, heat 2 tsp. olive oil in a large stockpot. Sauté ½ an onion (chopped) over medium heat. Add one medium potato (peeled and chopped), three cups broccoli (chopped), and three cups vegetable stock. Bring to a boil, reduce and simmer, covered, 12-15 minutes, or until potatoes are fork tender. Stir occasionally. Allow to cool slightly, puree in small batches or using a stick blender. Stir in one cup of shredded cheese, if desired. Serves four.
To see what’s happening in our kitchen, or to share what’s going on in yours, please stop by, or become a fan on Facebook. Happy (gluten-free) cooking!
One question I get asked often is how I get my daughter to eat such healthy school lunches. Her eating habits didn’t begin when she entered school, though, they began when we first introduced solids. We fed them what we ate. Nothing fancy, no “baby food” recipes; just plainer, mashed up versions of our own dinners. I know there are lots of kids’ convenience foods out there- those made-of-air puffs, special veggie drinks, jars of “toddler” food, animal shaped chicken nuggets, and the like. However, many “kid foods” are fried, made of refined flour, and have lots of added sugar. I’ve had more success with serving “grown-up” foods in a palatable fashion (fruit on a stick, veggies laid out in the shape of a flower) than relying on foods marketed for kids.
space
When my daughter entered school, I found a fun bento-box style lunchbox. It gives her food a fun feel, and allows me to neatly include each food group without it “touching.” This particular box even came it’s own stainless steel fork and spoon, lids so that wet items keep to themselves, and a mini container for dips or dressings. Quickly, she and I were both surprised at how different her foods were from that of her friends. While peers have asked her why she eats “green leaves” (baby spinach) and “green seeds” (edamame), I’m happy to say that she enjoys what I give her, without complaint. While kids can go through picky phases (both of mine have) I’ve found that if you continue to offer them what you want them to eat, they’ll eat at least some of it, at least some of the time. School lunches are no different.
space
School lunches

space
This school lunch is fairly basic and kid-friendly, but could easily satisfy an adult (in fact, my husband’s lunch for this day was identical, and yes, I packed that too!). She asked for peanut butter and jelly, but it’s on a brown-rice wrap. Soy yogurt meets her calcium needs, while grapes and sugar snap peas cover fruits and veggies. Other days I’ve included pasta salad, leftover chicken, cheese and crackers, hard-boiled eggs, cottage cheese, or rolled deli turkey. Cucumbers, baby spinach, carrots, or red peppers can stand in for the veggies, while cut-up apple, orange, or even mango fill in as fruits. Knowing your child and what he or she will like best is essential, but you may be surprised to see what kids will eat when they’re out of the house, and hungry.
space
Kale is one of those vegetables, similar to collard greens, that I always intend to incorporate into our meals but can never find palatable ways to do so. Other than slipping it into soups (and I can’t get my family to eat soup as a main course too often) I’m at a loss. I always hear that kale chips are a great way to transform kale into something delightful, but my last attempt was more like disappointing. They came out terribly bitter, and my husband swears they made us sick afterwards. I held off on trying again, but they were on sale last week, so I took it as a sign. I decided to do some thorough research and give it another go.
Basically, what I learned is there are two essential steps to getting kale chips just right, and I unfortunately did neither the first time I made them. Cutting the leaves off the stems (which are the source of bitterness) is essential, as is thoroughly drying the leaves before baking, so that they get crispy rather than soggy. This time I was diligent, and they were perfect. I took step by step photos as I went along so the process would be easy to replicate. The methodology I followed came from Real Food Digest.
Making Kale Chips

First, put the entire bunch of kale in a strainer and wash well, paying attention to dirt that can get trapped between the stem and leaves. Even though you’ll next do some trimming, it is easier to wash the leaves as whole pieces.
spacer

Next, trim the leaves off the stems, staying as close to the stem as possible. Then rip the pieces into chip-sized bites. I wasn’t quite sure how to get a photo of myself in action, but my four-year-old took this photo for me, budding photographer and chef that she is.
spacer

When you’re done trimming, your stems should look like this. We tossed them in the compost.
spacer

Next (this is a really important step), spread them out on racks (like the kind you use to cool baked goods), and pat them very, very dry. Then let them air dry for as long as possible. I did this a few hours before I was going to bake them, and left the nearby window open.
spacer

Once they’re dry, put them into a bowl, and season and massage them. Yes, massage them. My kids thought it was hysterical. The concept comes from KB/Superhero, and it was the funniest thing I came across online while researching kale chips. KB said, “Now it’s time to give the kale an intense massage. Pretend your a Swiss masseuse and you’re taking out your frustrations on a Wall Street jackass. Really let him have it. Massage that dressing into the kale.” (In this case, I massaged in one tablespoon of olive oil, then I sprinkled them with one teaspoon of kosher salt once they were on the baking sheet. They can be made them sweet, savory, or however you like them).
spacer

Next, spread them onto however many baking sheets you need to not have leaves overlapping (I needed two large baking sheets). How you bake them seems to be another key component. Some websites recommended quick, high temps to crisp them, whereas others recommended longer, lower temps to dry them out. I went with the latter, and baked them at 250 for 35-40 mins, rotating the trays halfway through. Keep close to the oven and check them after 30 mins, so you can monitor when they get crisp but before they burn. Taste one and you’ll know if it’s done.
spacer

Done, they’ll look crisp and dry, and are crunchy.
spacer

Finally, serve alongside a casual meal. We had ours with tomato/turkey bacon/grilled cheese sandwiches, and oranges. After dinner, I brought my daughter to dance class and my husband stayed home to handle clean-up. I was sad, although not surprised, to find out the kale chips were completely gone when I returned. I’ll consider that a good thing.
spacer
To see what’s happening in our kitchen, or to share what’s going on in yours, please stop by, or become a fan on Facebook. Happy (gluten-free) cooking!

It’s nice to have a simple, versatile side dish to accompany a family meal. Kids (and many adults!) can be picky about vegetables, so having a few options in your repertoire can’t hurt. I’ve recently discovered Pinterest, and was delighted to find a plethora of new recipes to try. This recipe was one of my Pinterest finds, although it originally comes from allrecipes.
A verstile side dish: Zucchini and Potato Bake

This recipe, Zucchini and Potato Bake, is pretty self-explanatory, and for once, I didn’t make any changes. (Wait, have I ever said those words before? Probably not). I did use gluten-free breadcrumbs I’d made; tailor that to your dietary needs. Although I often use glass baking dishes, I used a cast-iron enamel pan (which happens to have been passed down from my grandmother- she said she got it as a wedding gift) and it crisped up the potatoes nicely. Try this one out, and feel free to spruce it up (I considered adding some fresh herbs or spices, but decided not to since it was the first time I was making it). My kids did like it, although one daughter picked out all of the zucchini, and the other picked out half of the zucchini and red peppers. Continual exposure can’t hurt, though, and you pick your battles. If your family has preferences for one kind of vegetable over another, substitutions are worth trying as well. For us, this dish went well with turkey burgers, carrots, and fruit.

To see what’s happening in our kitchen, or to share what’s going on in yours, please stop by, or become a fan on Facebook. Happy (gluten-free) cooking!
Recently, I woke up at 3 am and couldn’t fall back to sleep. Overachiever that I am, I decided to get up and get some things crossed off my to-do list. I threw in a load of laundry, emptied the dishwasher, and suddenly the words “crockpot pancake” popped into my head. A while back I’d seen a recipe for making a giant pancake in the crockpot, and I’d stored it away in my memory for a morning when I was up early enough to give it the time to cook, or some afternoon when I was planning breakfast for dinner. It takes two hours to cook, but since it was 4 am at that point, it seemed perfect. It was.
A giant crockpot pancake

The idea comes from my favorite crockpot site, and the pancake recipe comes from a great gluten-free cookbook. The crockpot directions state you can use an 18 oz. pancake mix (and the corresponding ingredients it would require, such as eggs, oil, milk) or your own ingredients. I had a recipe for gluten-free pancakes, so I doubled it, assuming that’d be about the right amount. I’ll share the recipe here, or feel free to use a mix or your favorite recipe. Of course, this can be gluten-free, even dairy-free, or neither, depending on your needs. The beauty of this one was that it literally cooked itself, and I was free to go on my merry way and fold socks. At 5 am. I know, I need help.
- 4 eggs
- 1 ½ c. flour (brown rice flour if you’re gluten-free)
- 2 T. baking powder
- ½ c. oil
- ½ tsp. salt
- 4 T. sugar
- 1 ½ tsp, xanthan gum (omit if using regular flour)
- 1 tsp, vanilla
- 2 c. milk (dairy-free, if you desire)
- 1 c. blueberries (I added this; you can swap in another fruit for sure)
This is the doubled recipe- halve it if you’re just using it to make pancakes. Combine, mixing well. Pour into greased crockpot. Cook on high for two hours. Edges will be slightly browned, and middle will be firm. Do not overcook.
When my family finally rolled out of bed at 6:30 am (lazy-bones!), they were excited to find a beautiful “slice” of pancake ready to eat. It came out thick, fluffy, and had the perfect texture. The clean-up was minimal, and it tasted really good. We’ll definitely make this again.
To see what’s happening in our kitchen, or to share what’s going on in yours, please stop by, or become a fan on Facebook. Happy (gluten-free) cooking!
The other night I needed a meal that would come together quickly, yet be suitable to serve to guests, both picky and discerning. We were in the mood for chinese food, but being gluten-free, ordering take-out can be a risk. I turned to one of my favorite recipe websites, and was excited to try this dish. As always, I made a few minor revisions, and we were very, very happy with dinner. I’m usually hesitant to make this type of dish in the crockpot, as vegetables can easily get overcooked, but adding them as a final step worked perfectly.
Crockpot General Tso’s

Beginning with this recipe for General Tso’s, I decided to make a few changes to make it more akin to sesame chicken, a favorite in our house. When making the sauce, I added a tablespoon of sake and a teaspoon of sesame oil. Before serving, I sprinkled with sesame seeds, which I lightly browned in a frying pan beforehand. Served over brown rice (with yellow squash puree) and some orange slices, it was a great dinner that kept me out of the kitchen until the end of the meal.
To see what’s happening in our kitchen, or to share what’s going on in yours, please stop by, or become a fan on Facebook. Happy (gluten-free) cooking!
Valentine’s Day has past, but I wanted to share what we had on our table that morning. These pancakes are quick to make, very tasty, and would be cute in any shape. Surprise your family with a little love at breakfast for dinner sometime, or tuck this idea into your memory for next year.
Buckwheat heart-shaped pancakes

- ¾ cup buckwheat
- ¾ cup flour (regular or gluten-free)
- 2 Tbsp sugar
- 1 Tbsp baking powder
- ½ tsp salt
- 1 ½ cup milk
- 2 egg whites
- 1 tsp vanilla (I added this in)
- ¼ cup melted butter
- diced strawberries (optional)
In a medium-sized bowl, whisk dry ingredients together. In a small bowl, whisk wet ingredients together. Add wet ingredients to dry, mix until well blended. Add strawberries. Pour by ¼ cup onto greased, hot griddle or frying pan, in the shape of a heart. Cook 2-4 minutes, until brown on edges and bubbling, and flip, repeating on other side.
Serve with syrup or powdered sugar, and enjoy!
(Original, non-heart shaped, non-strawberry recipe comes from a great, very family-friendly book, Gluten-Free Made Simple).
